- Home
- Guide books
- Renovating and preparing a rental
Renovating and preparing a rental
Plan renovations room by room, finance them, choose durable upgrades and present the home well.
Chapter 1 Plan rental renovations room by room
Review sixteen improvement candidates against the property's condition, resident needs and full project cost. Resolve required repairs, hazards and qualified-work requirements before choosing cosmetic upgrades.
Resolve the condition and hazards first
Separate required maintenance from an optional improvement. Record the existing defect, photographs, dimensions and desired result. A new finish should not conceal a leak, structural problem or failed equipment. Ask a qualified professional to assess uncertain conditions before specifying the work.
Before disturbing old painted surfaces, review the building's age and EPA's Renovation, Repair and Painting program or the responsible authorized state program. Covered pre-1978 rental work can require certified firms and lead-safe practices. Confirm scope, coverage and any exemptions; a rental owner should not assume the exemption for work on a personally occupied home applies.
EPA advises using trained, accredited asbestos professionals when suspect material may be disturbed or is damaged. Appearance alone does not establish whether asbestos is present. Keep suspect material undisturbed and obtain the appropriate assessment rather than sampling, sanding or removing it yourself.
Review the building envelope and entrance
- Roof condition: have a qualified roofer assess leaks, deterioration and the relevant repair or replacement scope. A fixed fifteen-year replacement rule does not account for the actual roofing system, installation and condition.
- Windows: investigate leaks, operation, seals and frame condition. Compare repair with suitable replacement, including installation, ventilation, required exit use and product performance. Check permissions before changing the opening or window treatments.
- Doors: review the frame, hardware, operation, security and any fire-rated or accessibility requirements. Match the actual specification rather than ordering solely by appearance or approximate dimensions.
- Entrance lighting: assess the route and suitable weather-rated fixtures with the responsible qualified professional. Check electrical requirements, controls and neighboring light spill; a decorative fitting does not establish a security guarantee.
Plan grounds and exterior care
- Landscaping: choose manageable planting suited to the site and maintenance plan. Keep routes, sightlines, drainage and equipment access clear. Tree work, overhead utilities and uncertain structural planting need qualified assessment.
- Exterior cleaning: identify the surface, coating and actual contamination before selecting a method. Use a qualified contractor for hazardous access or equipment. An unsuitable pressure wash can damage finishes, windows and seals; a clean appearance is not proof that an underlying defect is repaired.
Compare living-area finishes
- Flooring: compare condition, subfloor preparation, moisture, traction, noise, cleaning and repairability. Resolve suspect old materials before disturbance. Confirm installation and building requirements rather than assuming carpet or another surface has one mandatory replacement age.
- Wall finishes: repair the actual defect and choose appropriate preparation and coating. Review lead-related requirements, product instructions and ventilation. A low- or zero-VOC label does not make every exposure or suitability question disappear; compare samples in the actual light before ordering.
Review practical kitchen changes
- Storage: measure reachable space, drawer movement and existing cabinet capacity. A pull-out or reorganized shelf may solve the problem without a full replacement. Confirm secure installation and appliance clearances.
- Cabinet fronts and hardware: check whether the existing cabinet boxes are sound and the proposed doors, hinges and handles fit. Compare repair, refinishing and replacement with the preparation included.
- Countertops: assess support, dimensions, seams, moisture, heat and care instructions. Compare total installed cost and maintainability; a material's luxury label does not establish a rent premium.
- Backsplash: choose a suitable cleanable surface and compatible installation. Confirm adhesion, moisture condition and appliance requirements. A removable tile is not automatically harmless to the underlying finish or appropriate near every heat source.
Check bathroom function and compatibility
- Storage: place secure shelving or a cabinet without reducing required access, interfering with the door or creating an unstable reach. Check the wall and hidden services before installation.
- Vanity: assess the cabinet, water damage, dimensions and access needs. A different vanity may require plumbing changes and qualified installation; compare repair with replacement before ordering.
- Plumbing fixtures: review actual leaks, condition, compatibility and service access with the responsible professional. Match required flow and installation requirements. A universal ten-year replacement schedule is not a substitute for that assessment.
- Lighting: use suitable fixtures and compatible bulbs for the location. Electrical alterations require the appropriate qualified work and approvals. USFA advises keeping combustible material away from bulbs and fixtures, so improvised fabric shades or painted electrical fittings are not a general upgrade method.
Compare written scope and the full cost
Download renovation plan (CSV)
Obtain dated estimates for the same work. Record preparation, materials, labor, permits, hazard assessment, disposal, cleanup, inspection, disruption, vacancy and ongoing maintenance. Identify assumptions, allowance items and a contingency for unresolved conditions. An old national price range is not a current quote for your property.
Use relevant rental comparables to test an expected premium. For invented arithmetic only, a $6,000 optional project with a supported $75 monthly increase has an 80-occupied-month gross payback before other costs. If additional ongoing cost is $25 monthly, the simplified $50 contribution takes 120 occupied months to cover that same project cost. Vacancy, financing, taxes, future replacements and the timing of receipts are excluded. This is not a return-on-investment rate or a forecast.
If an increase is unproven, test a zero-increase scenario and the applicable rent restrictions. Some work is necessary regardless of a premium. Review accounting, tax, assessment and insurance effects with the appropriate professional. A renovated home or higher proposed rent does not establish who will pay reliably or maintain it well.
Arrange the work and verify completion
Check permissions, contractor qualifications, insurance, permits and required sign-offs for the actual scope. Agree on who approves changes and how costs and dates will be revised. Owners arrange the people who inspect and install; software organizes the tasks and record.
Communicate lawful access, disruption and practical alternatives with residents, preserving required services and accessible routes. An optional renovation does not itself authorize a tenancy termination or removal of an accommodation. Review the property's current rules and agreement before changing occupancy or terms.
Keep the accepted scope, approvals, invoices, photographs, product instructions and remaining items together. Confirm required inspections and operation after completion, then update maintenance and listing information with the actual result. Describe installed features accurately without promising a fixed increase in rent or property value.
Sources and further reading
Also online: Plan rental renovations room by room
Chapter 2 Eleven design questions for a useful rental improvement
Start with how the home is used, define the work and its constraints, then review the result. A clear design process helps a small rental project as much as a large one.
Define the problem before choosing a product
1. What practical problem are we solving? Write one sentence about the existing condition and desired result. A dark entry, insufficient storage and a leak are different problems; decoration should not conceal a needed repair.
2. What evidence supports that choice? Keep dimensions, condition photographs, user observations and the relevant equipment instructions. Ask the people who use the space what happens there without assuming their preferences from age or other personal characteristics.
3. Which constraints must be resolved first? Identify access, safety, permission, accessibility, building rules and any local permit or qualified-work requirements. Confirm uncertain matters with the responsible authority or professional before ordering or changing the building.
Compare options by use as well as appearance
4. What alternatives could solve the problem? Sketch more than one arrangement. Moving approved storage may address a cluttered route without replacing a whole room. Compare the options against the actual task and dimensions.
5. How will the change work on an ordinary day? Check doors, drawers, circulation, cleaning, light, ventilation and access to equipment. Keep exit routes clear. Think through the arrangement with the actual household rather than an idealized photo.
6. What small trial is possible? Test a furniture layout or material sample where practical and permitted. Obtain needed consent and keep the trial reversible. A trial is unsuitable for improvising structural, electrical, gas or other work that requires qualified planning and installation.
Turn the idea into a workable project
7. What does the full scope cost? Request estimates for the same written work, including preparation, installation, required approvals, cleanup and ongoing maintenance. Record allowances and unresolved items. A lower headline price is not necessarily the same scope.
8. Who makes each decision and completes each task? Name the owner, reviewer, appropriate qualified contractor and contact for residents. Give each person the information and authority needed for their task. Software can organize the record but cannot inspect or install the work.
9. What sequence protects the people using the home? Confirm materials, access, disruption and the next update before starting. Plan around verified deadlines and applicable resident rights. If conditions change, resolve the revised plan instead of silently extending the work.
Agree on funding before work starts
A tenant improvement is an alteration agreed for the occupant's use; the label does not decide who pays or which work is permitted. Describe the exact location, materials, attachment, affected systems and intended result. Separate an optional alteration from a condition requiring repair, and confirm the responsible party under the actual lease and law.
Possible requests include fixed storage, flooring, a revised interior layout, lighting, ventilation or plumbing for a particular occupant. Identify each item and the required qualified work; do not treat this list as permission to start. A necessary repair, building-wide replacement or removable furnishing has different purposes and responsibilities. These project labels do not decide tax classification, habitability duties or allowance eligibility.
A tenant improvement allowance is an agreed contribution toward specified work. A rent concession is a separate change to rent, which may have a different purpose. Neither is automatic authorization to undertake work or reduce a rent payment. Record the reviewed arrangement and effective date in the appropriate signed documents.
| Decision | Write down before approval |
|---|---|
| Included scope | Permitted work, materials, labor, fees, exclusions and required approval evidence. |
| Contribution | Who pays, maximum allowance, any tenant contribution and how unused funds are handled. |
| Payment evidence | Approved estimates, invoices, completion milestones, reimbursement process and due dates. |
| Rent credit | Exact amount, applicable rental periods, conditions, effective date and the accepted accounting treatment. |
| Change or overrun | Who may approve changes, revised cost and timing, and what happens before additional work begins. |
For instance, if an approved scope changes when a hidden condition is found, obtain the appropriate qualified assessment and a reviewed revised plan. Do not assume the tenant pays every overrun or that an allowance reimburses every purchase. Keep required refundable or restricted funds separate from project spending. Use the maintenance-budget guide for cash planning.
Set ownership, upkeep and closeout terms
Agree who selects qualified workers, obtains necessary authority approvals and inspections, coordinates lawful access and tells residents about disruption. Confirm relevant insurance and building or association rules with the responsible professional. Owner approval does not replace a required permit, and the tenant's request does not waive safety or habitability duties.
Before installation, identify who owns each item while the lease runs and after it ends, who maintains and repairs it, which warranties and instructions transfer, and whether removal or restoration is required and lawful. Distinguish removable belongings from fixed alterations; do not assume that who paid automatically decides ownership. Review disability-related restoration conditions separately.
At handoff, compare the finished work with the accepted scope, save required sign-offs, dated photos, invoices, receipts, manuals and unresolved items, and reconcile contributions and actual rent credits. Record any agreed follow-up and responsible person. An occupied-unit improvement is not complete merely because a payment was made. At move-out, compare condition evidence and the reviewed agreement; an alteration does not automatically justify a security-deposit deduction. Follow applicable itemization and refund rules.
Use the lease and addendum review and document instructions to organize an appropriate record. Rentari supplies software and written guidance; it does not inspect, permit, perform or certify the physical project, or settle its legal effect.
Separate accessibility and tax decisions from the project label
A disability-related change requires its own legal review rather than treatment as an ordinary optional decorating request. The HUD/DOJ reasonable-modifications statement addresses covered housing, necessary modifications, permission, work and restoration conditions; federally assisted housing can involve different responsibilities. Confirm applicable protections and who pays with qualified advice. Collect only information appropriately needed for the request and protect its confidentiality.
Do not infer tax treatment from tenant improvement, leasehold improvement or the project price. IRS Publication 527 distinguishes repair expenses from work that betters, restores or adapts rental property and may require capitalization. Publication 946 defines qualified improvement property around qualifying interior work in a building that is not residential real property, placed in service after the building was first placed in service, and excludes enlargement, elevators and escalators and internal structural framework. Not every residential alteration is qualified improvement property or universally depreciated over 15 years.
Give the preparer ownership and use facts, the signed funding arrangement, scope, costs, invoices, reimbursements, credits and the date the work was ready for its intended use. Have them determine the asset, who claims the cost, applicable-year classification, method, elections and limitations. These publications currently address 2025 returns; check later developments and the actual filing year. See the existing rental tax review for supporting questions.
Check details and learn from the finished work
10. What will prove completion? Agree on the finished condition, required inspection or sign-off, instructions and cleanup. Keep dated photographs, invoices, approvals and remaining items together. Review small details such as hardware operation and accessible routes, as well as the overall appearance.
11. What should be changed next time? Compare the result with the original problem after normal use. Record what worked, unresolved concerns and maintenance needs. Update the project checklist from evidence, and fix any new defect through the proper process.
These are original practical prompts, not attributed architect quotations or a promise of investment return. Creativity can improve a home; it does not establish a resident's ability to pay rent. Keep improvement decisions separate from the lawful application and screening process.
Sources and further reading
Also online: Eleven design questions for a useful rental improvement
Chapter 3 Planning a value-add renovation of a small multifamily rental
A value-add renovation upgrades a building so it can earn more or cost less to run. Plan the scope from the building's condition and local rents, get the permits, budget a contingency, follow lead-safe rules for buildings from before 1978 and your state's notice rules for occupied units, then measure the result with rent and expense data.
Start with the building, then the market
Fix what the building needs before you add what renters might pay for. Have the roof, structure, plumbing, electrical and heating checked, and put safety and habitability items first.
Then look at the market. Compare your current rents with listings for similar renovated units nearby and with HUD's Fair Market Rents, which estimate the 40th percentile gross rent paid by recent movers into standard quality units. Decide which upgrades renters in that market value enough to support the rent you need, and which units to do first, for example the ones whose leases end soonest.
Write the scope and get permits
- Scope by unit and area. List each unit and common area, the work in each and the finish level, so bids compare line by line.
- Ask about permits early. Before you sign contracts, ask your city or county building department which items need permits and inspections, and how long reviews take.
- Check demolition notices. In California, if you apply for a permit to demolish a unit, you must tell current tenants before you apply and tell prospective tenants in writing before signing a lease or taking an application fee (Cal. Civ. Code § 1940.6(a), (b)).
- Keep the paper trail. File permits, inspection sign-offs and contracts with the property records.
Budget with a contingency
Build the budget from the scope, then add what is easy to forget:
- Permits, design and inspection fees.
- Lost rent while units are empty.
- Relocation payments, where your state or city requires them.
- A contingency line for problems found once walls are open. Set the amount from the building's age and condition and from your own past projects.
Ask contractors to separate repairs from improvements on their invoices. The tax treatment differs, and itemized bills make the split possible.
Lead-safe work in buildings from before 1978
EPA's Renovation, Repair and Painting rule applies to paid work that disturbs paint in housing built before 1978. EPA says rent counts as compensation, so work by landlords and their employees is covered. Key requirements from EPA's March 2026 compliance guide:
- Certification. The firm must be certified, and workers must be trained as or by a certified renovator in lead-safe work practices.
- Pamphlet before work. Give the Renovate Right pamphlet to the owner and occupants before the work starts. Delivered in person, it can be given any time before work begins, as long as work starts within 60 days. Mailed, it must go at least 7 days before work, with a certificate of mailing.
- Common areas. For work in common areas, either give renovation notices to tenants or post informational signs.
- Small jobs. Minor repair and maintenance that disturbs 6 square feet or less of paint per room inside, or 20 square feet or less outside, is exempt, but window replacement and demolition never are. Jobs in the same room within 30 days count as one job.
States can set stricter rules. Maine, for example, requires 30 days' notice, a sign on exterior entry doors and certified mail to every unit before work that may disturb lead-based paint in a rental building built before 1978 (14 M.R.S. § 6030-B(3)). When you lease the renovated units, the federal disclosure rule still applies: disclose known lead-based paint and hazards, give the Protect Your Family From Lead in Your Home pamphlet and include a lead warning statement in the lease.
Occupied units: notice, relocation and rent rules
Renovating around current renters, or ending tenancies to renovate, is tightly regulated in some places. Verified examples:
- Oregon: after the first year, you may end a month-to-month tenancy for repairs that make the unit unsafe or unfit to live in only with at least 90 days' written notice stating the reason (ORS 90.427), and you must pay one month's rent with the notice unless you have an ownership interest in four or fewer dwelling units (ORS 90.427(6)).
- Washington: demolition, substantial rehabilitation or a change of use needs at least 120 days' notice (RCW 59.18.650(2)(d), (e), (f), (m)) (RCW 59.18.200(2)(c)), and local governments may require relocation assistance for low-income tenants (RCW 59.18.440).
- District of Columbia: approved renovations carry a 120-day notice to vacate, with relocation help and limits on re-renting in some cases (D.C. Code § 42-3505.01(d), (f), (i)).
- California: where the just cause rules apply, a no-fault termination requires relocation help equal to one month's rent or a written waiver of the final month's rent (Cal. Civ. Code § 1946.2(d)).
Rent increases after the work are still subject to any statewide cap, such as California's (Cal. Civ. Code § 1947.12(a)). Check your state and city before you schedule the first unit.
Measure the results
Record the baseline for each unit before work starts, then compare after it settles:
- Rent per unit and days vacant between renters.
- Operating expenses per unit, including repairs and utilities.
- Net operating income for the building: income less operating expenses, before debt service.
- Work orders per unit, as a sign of whether the new finishes hold up.
- Actual cost against budget, including how much contingency you used.
Separate what the renovation did from what the market did. If rents for unrenovated units nearby rose too, only the difference is fairly credited to the work.
This guide is general information, not legal advice. Rules change and vary by state and city, so confirm how they apply to your situation with a local attorney.
How Rentari helps
Rentari's work orders to vendors and vendor records keep each contractor's jobs in one place, and messaging with renters keeps a dated record of notices and schedules. In accounting, split transactions separate repairs from improvements on one bill, and fixed assets with depreciation entries hold the costs you capitalize.
Sources and further reading
- EPA Small Entity Compliance Guide to Renovate Right (EPA-740-K-26-003, March 2026)
- EPA: Lead Renovation, Repair and Painting Program rules
- EPA: Lead-based paint disclosure rule (Section 1018 of Title X)
- HUD: Fair Market Rents for fiscal year 2027, Federal Register notice
- Oregon Revised Statutes chapter 90 (ORS 90.427)
- Maine Revised Statutes title 14, 6030-B: lead notice before renovation
Also online: Planning a value-add renovation of a small multifamily rental
Chapter 4 Prepare a Renovation Financing Comparison Before You Apply
Before choosing renovation financing, establish the work scope and the information needed to compare offers. A low advertised payment can conceal a different term, fee structure, or repayment risk.
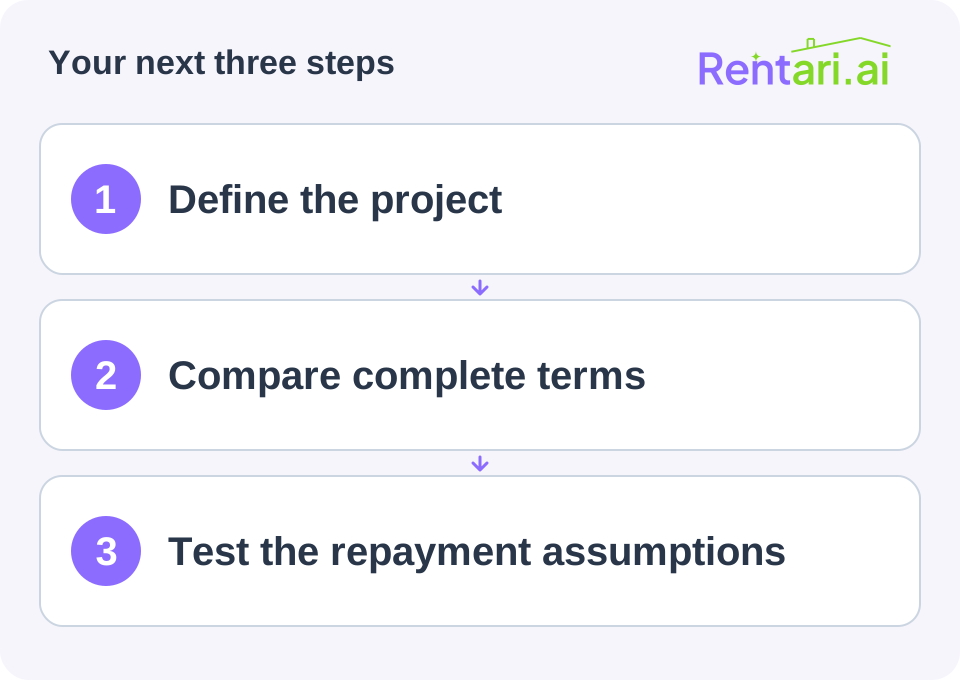
Define the project
Obtain realistic scope, quotes, permits where applicable, timing, contingency assumptions, and operational impact. Separate necessary work from optional improvements. Do not assume an unverified rent increase will fund the project.
Identify available cash and obligations with appropriate financial advice for your circumstances.
Request comparable terms
Record amount financed, rate, fixed or variable structure, fees, term, payment schedule, collateral, guarantees, prepayment conditions, and total repayment information. Ask how delayed draws or project changes affect cost.
The CFPB's mortgage comparison guidance illustrates why complete terms matter. Not every business-purpose or renovation product uses the same disclosures, so ask the lender what applies to the actual offer.
Review the downside
Consider what happens if work costs more, occupancy is delayed, or expected income does not materialize. Use realistic scenarios and qualified advice rather than a promised return.
Keep each offer and its assumptions dated. Before signing, resolve unclear terms with the lender and relevant professionals.
This is a preparation workflow, not a recommendation to borrow. The useful outcome is a comparison you can explain without relying solely on the monthly payment.
Sources and further reading
Source review: September 24, 2026. Check current requirements before acting.
Continue with a related task
Also online: Prepare a Renovation Financing Comparison Before You Apply
Chapter 5 Energy-efficient rental upgrades and Passive House retrofits
Compare practical energy improvements with the building's condition, project cost, ventilation needs, and actual utility use. A Passive House retrofit follows a specific certification path; it is not a guaranteed savings or rent premium.
Find the cause before buying equipment
Review utility use over comparable seasons and check for leaks, damaged seals, blocked vents, and poorly maintained equipment. Separate changes in weather, occupancy, and billing rates from a change in performance. Ask the resident about the actual comfort problem.
Arrange appropriate professional assessment for heating, cooling, wiring, moisture, or ventilation issues. A low-cost cosmetic change will not resolve unsafe equipment or a building defect. Avoid promising a savings percentage without a property-specific basis.
Compare improvement options
Consider suitable lighting, weather sealing, efficient appliances, shading, and equipment servicing. Check compatibility, installation requirements, warranty, repairability, and expected life. Confirm whether an association, permit, or owner approval is required.
Identify who pays the utility bill and who controls the equipment. If a resident benefits from lower bills while the owner pays the installation cost, describe that arrangement clearly. Check current incentive eligibility with the administering organization before including a rebate in the budget.
Consider the landscape and daily workflow too
- Water-smart planting: choose regionally suitable plants for the actual soil, sun, and rainfall. Group compatible watering needs and repair irrigation leaks. Consider useful lawn areas, drainage, accessibility, local rules, and establishment care before replacing a landscape. Low-water planting still needs an appropriate maintenance plan.
- Paperless records: use a verified digital application and document workflow where appropriate. Preserve accessible alternatives, valid delivery, record retrieval, privacy, and required retention. Do not claim a paper-saving total without measuring your own activity.
- Efficient appliances: compare the model's energy and water information with installation, repair, and replacement costs. Describe the equipment accurately in the listing without promising a universal rent premium.
- Thermostat controls: verify equipment compatibility, safe installation, practical schedules, and resident control. Explain operation and help contacts. Plan account access and handover for connected devices, including what happens when a resident leaves.
Prioritize a feasible improvement, record its baseline and total cost, then check whether it delivered the intended result.
Understand the Passive House standard
Passive House is a high-performance building standard, not a synonym for passive solar design, natural ventilation, or a home with no heating or cooling equipment. Certification programs combine measures such as a well-insulated and airtight enclosure, high-performance windows, reduced thermal bridges, controlled ventilation, project-specific energy targets, and quality checks. A certified home can still use mechanical heating, cooling, and dehumidification sized for the building and its climate.
The Passive House Institute (PHI) publishes the Passive House and EnerPHit standards, including a retrofit path for existing buildings. Phius has its own climate-specific standards, including Phius REVIVE 2024 for existing-building retrofits. These programs have distinct criteria and verification processes; they are not interchangeable labels. Ask the designer or certifier which current standard, project scope, and certification level a proposal actually follows. Do not describe a rental as certified unless the relevant program has issued certification for that property.
Plan a retrofit around this property
Start with dated energy bills, weather, occupancy, equipment condition, comfort reports, and who pays each utility. Have a qualified building professional assess the enclosure, moisture risks, ventilation, windows, heating and cooling, and electrical capacity before selecting measures. For a certification goal, bring a designer familiar with the chosen program into the planning stage; modeling and project-specific targets can change the scope.
Compare the full cost of assessment, design, permits, materials, installation, temporary relocation or disruption, future service, and replacement. Plan a moisture-safe sequence for air sealing and insulation, then define how fresh air will be supplied and measured. Do not seal openings, cover combustion-air pathways, or change ventilation equipment as a stand-alone energy-saving step. Confirm local code, resident access, and incentive rules with the authority or program administering them.
Verify the work and keep useful records
Agree in advance how the finished work will be checked. Depending on the project, the design team may use energy modeling, enclosure inspections, an airtightness test, measured ventilation airflow, and equipment start-up or commissioning. A qualified professional should set the test method and acceptance criteria for this building and certification program. A single blower-door result does not establish indoor-air quality, energy savings, or certification by itself.
Keep the scope, approved plans, product details, invoices, inspection and test results, operating instructions, and any issued certificate with the property record. Give residents plain instructions for ventilation controls, filters, and maintenance contacts, and explain what work is scheduled. Rentari can organize property, utility, expense, maintenance, and vendor records; it does not inspect, model, certify, or manage a retrofit.
Better comfort or lower energy use may result, but neither a fixed savings percentage nor a rent premium is assured. Verify any grant, rebate, or tax incentive directly with the administering program before budgeting or advertising it.
Give residents useful instructions
Explain approved controls, filter responsibilities, and how to report a fault. Do not restrict essential heating or cooling as a cost-saving measure without checking the governing requirements. Preserve accessible use and reasonable accommodation processes.
After the work, verify the installation and compare later use on a like-for-like basis. Keep the invoice, model, service instructions, and any observed comfort improvement in the property record.
Sources and further reading
Also online: Energy-efficient rental upgrades and Passive House retrofits
Chapter 6 Repairs or capital improvements: how to treat rental property work
A repair that keeps a rental in good working order is generally deducted in the year you pay it. Work that betters, restores or adapts the property is an improvement, which you depreciate instead. A few safe harbors let you deduct some costs that would otherwise be capitalized.
The basic rule
You can deduct the ordinary and necessary expenses of managing, conserving and maintaining a rental. IRS Topic 414 describes repairs as costs that keep your property in good working condition without adding to its value. Those go on Schedule E, line 14.
An improvement is different. Publication 527 says an expense is for an improvement if it results in a betterment, restores the property, or adapts it to a new or different use. You cannot deduct an improvement in the year you pay for it. You recover the cost through depreciation, generally as if the improvement were separate property.
Betterment, restoration and adaptation
The IRS tangible property guidance explains each category:
- Betterment: fixes a material condition or defect, adds a material addition or capacity, or materially increases productivity, efficiency, strength, quality or output. Publication 527 includes fixing a defect that existed before you bought the property and enlarging the property.
- Restoration: replaces a major component or substantial structural part, returns property in disrepair to ordinary operating condition, or rebuilds property to like-new condition after its class life.
- Adaptation: adapts property to a new or different use that is not consistent with its ordinary use when you first placed it in service.
Apply the test to the right unit
For a building, the rules look at the building structure and each key building system separately: plumbing, electrical, heating and air conditioning, elevators, escalators, fire protection and alarm, gas distribution and security. A lessor of an entire building applies the improvement rules to the whole structure and each of these systems.
This matters because whether you replaced a major component is measured against that system, not against the whole building. Replacing a large part of the plumbing system is judged against plumbing.
Remodels and common examples
Table 1-1 of Publication 527 lists examples of improvements, including:
- Additions: a bedroom, bathroom, deck, garage, porch or patio.
- Lawn and grounds: landscaping, driveway, walkway, fence, retaining wall, sprinkler system or swimming pool.
- Systems: a heating system, central air conditioning, furnace, duct work, septic system or water heater.
- Interior: built-in appliances, kitchen modernization, flooring or wall-to-wall carpeting.
- Other: a new roof, storm windows and doors, wiring upgrades or a security system.
A remodel that modernizes a kitchen is an improvement. When one contractor bill covers both a fix and an upgrade, Publication 527 advises separating the costs of repairs and improvements and keeping accurate records. Ask the contractor to itemize.
What you may be able to deduct now
- Ordinary repairs and maintenance that keep the property in efficient operating condition.
- De minimis safe harbor: if you elect it, items and improvements costing up to $2,500 per invoice or item can be deducted, reported on Schedule E, line 19.
- Routine maintenance safe harbor: recurring work you expect to do more than once in the 10 years after a building structure or system is placed in service. It can cover certain restorations but never betterments.
- Small taxpayer safe harbor: for a building with an unadjusted basis of $1 million or less, if the year's total for repairs, maintenance and improvements on it does not exceed the lesser of 2% of that basis or $10,000.
Recovering the cost of an improvement
An improvement takes the recovery period of the property it improves. Work on a residential rental building, such as a new roof, is generally depreciated over 27.5 years. Replacement appliances and carpets are 5-year property. Fences and other land improvements are 15-year property. Depreciation starts when the improvement is placed in service.
Where each cost goes on your return
- Repairs: Schedule E, line 14.
- Cleaning and maintenance: Schedule E, line 7.
- Supplies: Schedule E, line 15. Items costing $200 or less, or with a useful life of 12 months or less, can be treated as materials and supplies.
- De minimis amounts: Schedule E, line 19, if you made the election.
- Improvements: depreciation on Schedule E, line 18, figured on Form 4562 for the year the improvement is placed in service.
Records to keep
- Itemized invoices that describe the work and the part of the building affected.
- The reason for the work: a breakdown, wear, a defect or an upgrade.
- Dates, the unit or system involved, and before and after photos.
- A copy of any safe harbor election attached to your return.
The IRS says you generally need documentary evidence, such as receipts, canceled checks or bills, to support your expenses. A clear description on each invoice is what lets you defend the repair or improvement treatment later.
This guide is general information, not tax advice. Confirm how these rules apply to your situation with a tax professional.
How Rentari helps
Maintenance requests from renters, work orders to vendors and vendor records give each job a dated history in Rentari. In accounting, split transactions let you separate the repair and improvement parts of one bill, and fixed assets with depreciation entries hold the costs you capitalize. Rentari keeps the record; your preparer decides the tax treatment.
Sources and further reading
Also online: Repairs or capital improvements: how to treat rental property work
Chapter 7 Staging a rental for photos and showings
Staging helps renters understand a home quickly: how big the rooms are, where furniture fits and what is included. Cleaning, light and a few simple pieces do more than expensive props. Every photo should show the home a renter will actually get.
What staging should do for a rental
Staging a rental is not about making it look like a magazine. It helps a renter answer practical questions fast: Will my bed fit? Where does the couch go? How much light does the kitchen get? Good staging answers those questions before a renter has to ask.
A renter will live with the real home for a year or more. Aim for a clean, bright and accurate picture that matches what they see when they walk in. A showing that feels different from the photos costs you trust, and often the lead.
Start with cleaning, small repairs and light
Most of the effect comes from work that costs little:
- Deep clean kitchens, bathrooms, windows, floors and baseboards. Remove odors at the source instead of covering them.
- Fix what a renter will notice: burned-out bulbs, dripping taps, loose handles, sticking doors, missing outlet covers and scuffed paint.
- Use matching bulbs so rooms do not look yellow in one photo and blue in the next.
- Clear every surface. Empty counters, closets and the cabinet under the sink so renters can see the storage.
- Tidy the approach: walkway, entry, mailbox, trash area and parking. The first photo and the first step onto the property set expectations.
Furnish lightly, room by room
An empty room can look smaller than it is because there is nothing to judge scale against. A few pieces fix that:
- Bedrooms: a bed with plain linens shows what size fits. If you stage only one bedroom, stage the smallest.
- Living area: a sofa or two chairs and a rug show a usable layout without hiding the floor.
- Kitchen and dining: a small table in a dining nook, and no more than one or two items on the counter.
- Bathrooms: a shower curtain and clean towels.
Leave no doubt about what stays. If a washer, dryer, window unit or any furniture is not included, say so in the listing or take it out of the photos.
Take photos that match the listing
Shoot in daylight with blinds open and every light on. Hold the camera level at about chest height and use a wide setting that does not bend the walls. Show every room a renter will use, plus the outside, parking, laundry and any storage that comes with the unit, in the order someone would walk through.
Do not edit out stains, cracks or a neighbor's wall. If you use virtual staging, say so in the caption and include an unedited photo of the same room. Photos should show the home, not the kind of person you picture living there. Federal fair housing rules give, as an example of a discriminatory ad, using words, phrases, photographs or illustrations that convey a home is or is not available to a particular group because of a protected characteristic (24 C.F.R. § 100.75). The Fair Housing Act bars any rental ad that indicates a preference, limitation or discrimination based on race, color, religion, sex, handicap, familial status or national origin (42 U.S.C. § 3604(c)).
Prepare the home before each showing
- Arrive early to turn on lights, set a comfortable temperature and air out the rooms.
- Put out a one-page fact sheet with the rent, deposit, utilities, pet policy, available date and how to apply.
- Give every visitor the same facts and the same next step.
- Check the route in and out, keep keys and paperwork out of sight, and lock up afterward.
Answer accessibility questions with plain facts, such as the number of steps at the entry or whether there is an elevator. Facts help renters decide for themselves.
Staging and showing an occupied rental
When the current renter still lives there, their home and privacy come first. State law sets when you may enter to show the unit:
- Washington: one day's notice is enough to show the unit to prospective tenants or buyers, and you may not show it excessively (RCW 59.18.150(6)).
- Minnesota: make a good faith effort to give at least 24 hours' notice, and enter only between 8 a.m. and 8 p.m. unless the tenant agrees to another time (Minn. Stat. § 504B.211, subd. 2). Showing the unit to prospective tenants near the end of the lease is a listed business purpose (Minn. Stat. § 504B.211, subd. 3).
- California: except in an emergency or with the tenant's consent at the time, give reasonable written notice and enter only during normal business hours (Cal. Civ. Code § 1954(a), (b), (d)(1)).
Ask before photographing a renter's belongings. If nothing has changed, photos from the last vacancy may serve until the unit is empty. Group showings into a few set windows so the renter is not disturbed every day.
Keep the listing honest after it goes live
The FTC warns renters that scammers copy the photos and description from real rental listings and swap in their own contact details. After you post, search for your address and a distinctive photo to spot copies, and report any you find to the site. Update the photos whenever the condition of the home changes.
Listing photos are not a move-in record. In California, for a tenancy that begins on or after July 1, 2025, you must photograph the unit immediately before, or at the start of, the tenancy (Cal. Civ. Code § 1950.5(g)). Wherever you are, take a separate, dated set of photos when the renter moves in.
How Rentari helps
Rentari listings syndicate your photos and details to listing sites, and the leasing inbox keeps every lead's questions in one place. You can schedule showings from the same listing, so each visitor gets the same facts and the same next step.
Sources and further reading
- eCFR 24 C.F.R. § 100.75: discriminatory advertisements, statements and notices
- 42 U.S.C. § 3604: Fair Housing Act prohibitions
- FTC: Rental listing scams
- RCW 59.18.150: landlord's right of entry (Washington)
- Minn. Stat. § 504B.211: tenant's right to privacy (Minnesota)
- Cal. Civ. Code § 1954: landlord entry (California)
- Cal. Civ. Code § 1950.5: security deposits and move-in photos (California)
Also online: Staging a rental for photos and showings